Saturday, March 23, 2013

More Journal Cards

Journaling Cards are all the rage right now.  It is a way to make a layout in pieces, you know a bit at a time, and arrange them around your photos.  You can put some photos on cards, mat some photos, whatever really.  It's your book, your life.

This is a card I made for a swap that had a month theme.  I signed up for February because I love this paper!!


It's a retired paper and stamp (Cherish the Day S1111), but you could make something similar with other paper.  I stamped the lines using another retired stamp, Recipe Box D1364.  It's always handy to have stamps with just lines!!

Once again, I had fun sewing on paper.  I pierced the holes in all of the cards first using the Piercing Tool Kit.  I love it because it has it's own foam to put under the paper, so I don't have to go looking for something else - or be tempted to do something inappropriate like scar the kitchen table!!  ;)  Then I just sat in front of the TV and sewed the  buttons on one evening accompanied by my furry doggie-friend.
So snuggly!!


Friday, March 22, 2013

Handmade Journal Cards

I made some more journal cards.  More you ask?
Yes, well, the others are in the backlog of artwork that I have yet to blog about.  Oops!!
I'll show some to you now!!

First for the newest ones:
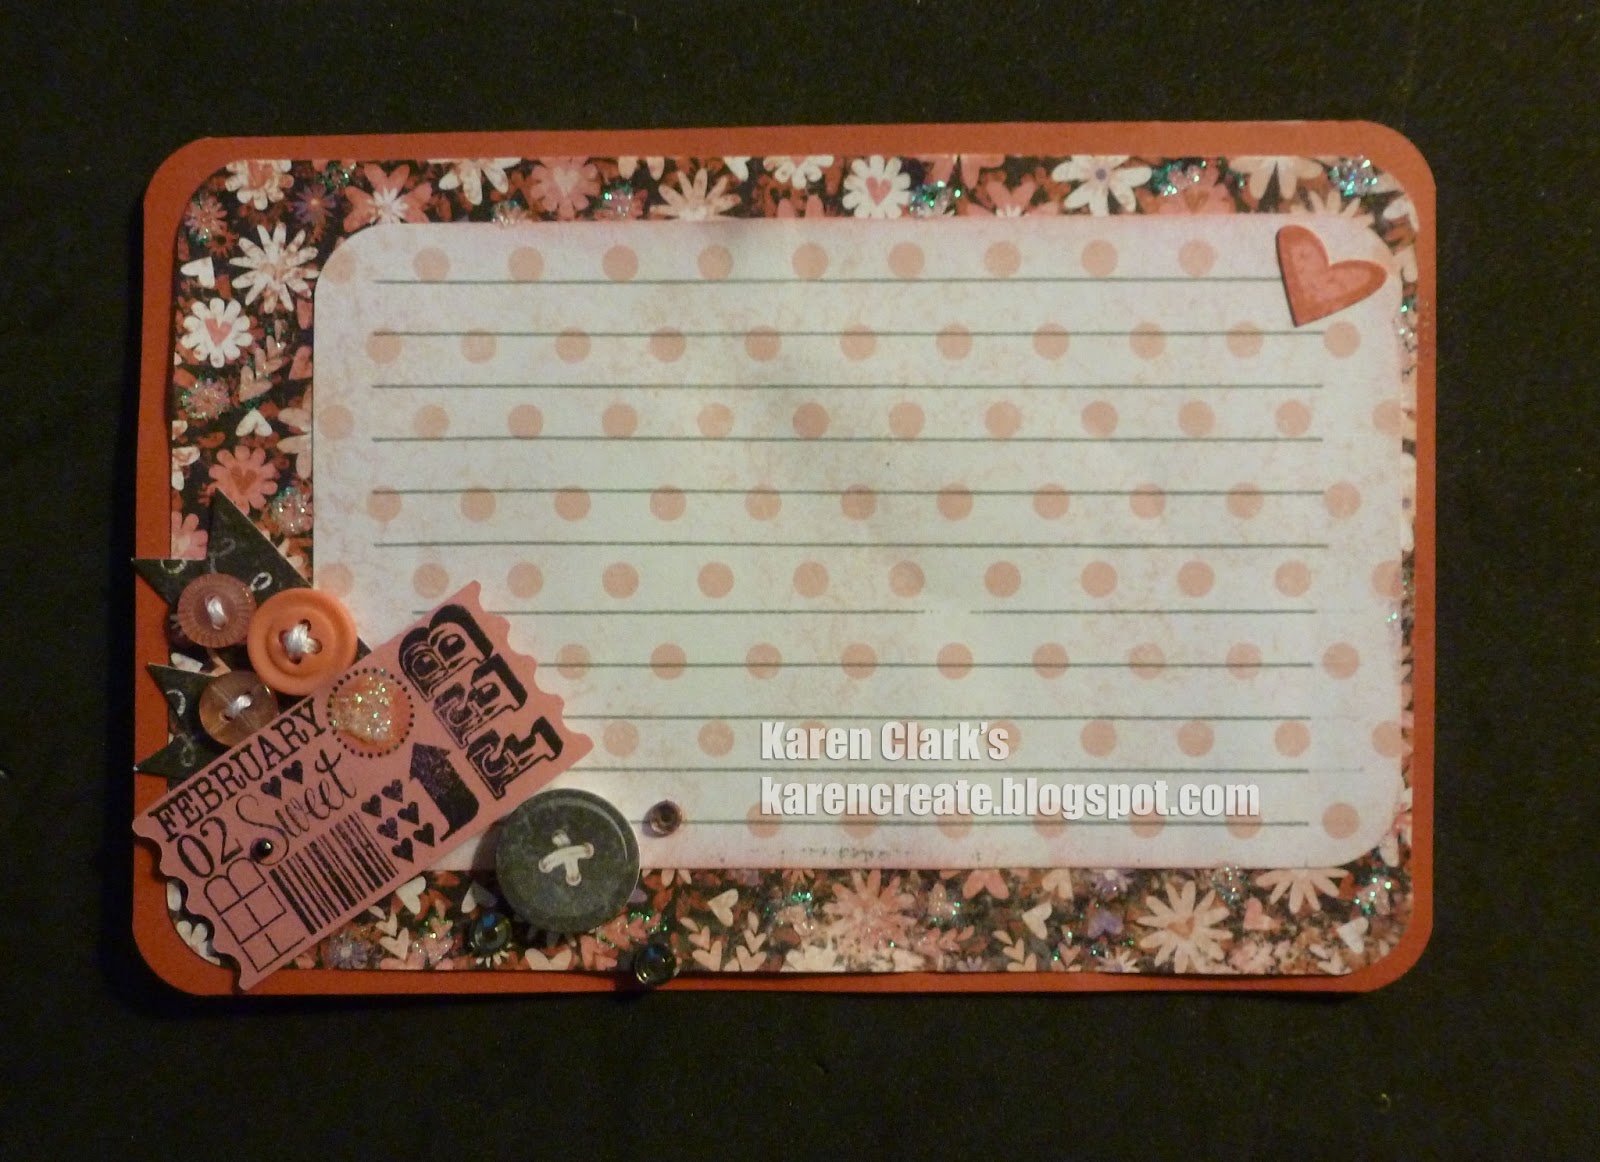
I made this 4" X 6" Journal Card with For Always paper.  It was really fun to play with, especially with the Black Shimmer Tape.  So rich looking!!  I put a layer of vellum over the writing design so that the lines can be used for journaling.  I don't know if you can see the grey sparkle on the upper left corner, but it shows up in real-life!!


I couldn't decide which paper I wanted to use, so I decided to go for a sampling of each down the left side.

Next I made a 3" X 4" Journal Card made with Chantilly:


These were fun because each one looked different.  The frame stamp is an OLD one (Frame of Mind D1201)  I cut those out by hand.  I love the Cricut cuts, but it's fun to cut crazy sometimes too!!

Now let's see if I can find some of the others that I have around here...


I went wild with the Dotty For You paper on this one.  Used the Xact-O Knife and cut around each wing of the butterfly paper, popped them up and inserted some foam tape under there.  I sewed Xs over the printed Xs on the paper in the center of the butterflies also.  That was really fun.  No sarcasm.  It really was!!  :)

Lisa cut the vellum on the Cricut for me.  I inked the edges with the Sweet Leaf pigment block and embossed it with clear embossing powder.  Loved the effect.

You can't see it in that photo, but under the vellum there is a stamped image:


OK, I've been such a slow blogger lately that I decided that I should save the other cards for another blog TOMORROW!!

Go get Creative,
Karen


Friday, March 1, 2013

Floral Happiness

Today starts a brand new month (and how did it get to be March already??)
and a brand new Stamp of the Month!!  This stamp is called Floral Happiness S1303
and this is my finished card, keeping it CAS (Clean and Simple) just wanted to show off the stamp!!


I only used the middle-sized rose stamps.  It takes two stamps to make this image.  I practiced lining them up on scratch paper first and figured out what worked for me.  It was looking closely at the lower right corner (I'm talking about the green image here) and matching up what I was seeing there and along the bottom, then the rest just fell into place.  Mastering this on scratch paper took the anxiety out of the rest of the project!!

This is Floral Happiness S1303, so that you can see how each rose image is made from two stamps.


BUT what if I only use one stamp?  Carolyn (my Art Therapist ;) and I were discussing this on the phone.  I had thought of doing this on a small strip of card stock, but Carolyn suggested doing it on a larger sheet to see what might appear.  I haven't tried the largest stamp yet, but here are my experiments thus far...

Different colors help maintain the floral image.
Now for two different tries with Hollyhock tone on tone.  The top strip uses the smallest rose which looks very much like a flower no matter what you do with it, but the bottom part starts looking less floral as I ran the images into each other.  Still a romantic look when done in the Hollyhock.  Definitely looked Valentine-like!!


I used Sky ink to help detract from the floral feel of this stamp.

Again, I used the same middle-sized rose, but made lines of it right-side up then up-side-down.  This distorts the rose lines so much that they become almost meaningless.  I can't wait to use this paper!!

More experiments, but this time played around with what the stamp was intended for!!


Will post more cards for you tomorrow!!
Hope that you have a wonder-filled creative day!!
Karen